
QuickBooks Clean Install tool
")
How To Run QuickBooks Clean Install Tool For System Smoothness?
QuickBooks holds a well-reputed position than others in the accounting world. And its reputation is all about its enhanced error detection and recovery mechanism. But do you know how this framework came into existence? You may not know about it, as the software’s performance is a coordinated outcome of different tools. And today, we will discuss how to use the QuickBooks Clean Install tool.
The clean install tool is an essential component for QB functioning. Thus, we selected this tool here so you can deploy it for future purposes. Meanwhile, you can also opt to connect to our QB Pro Advisors via the helpline number at 1-844-734-9204. Rest, it is time to start with the tool’s basic definition.
What Is A Clean Install Tool In QuickBooks?
Users find QuickBooks amazing because of its advanced features and utility options. Among these, the Clean Install is a specialized utility inducted by Intuit. This facility can help you clear up traces of QB software and associated installations. Hence, it fixes the issues you cannot address via regular uninstallation and re-installation.
Performing a clean install means the elimination of potential conflicts or corrupted files from QB. Thus, it brings an error-free environment for QB users. So, you can also deploy it on your QB framework to enjoy seamless working.
Signs That You May Need To Go With The Clean Install Tool
Going with the Clean Install tool requires uninstallation of QB software. And listed below are the instances when you may need to take this step using the QuickBooks Clean Install tool:
- Frequent interruptions in file processing.
- Issues in installing associated QB versions.
- Re-installation of QB software fails to fix common QB errors.
Pre-Arrangements For Cleaning QB Desktop
Before using the clean install tool, you must ensure the following requirements:
- Backup Company Files: Backup creation is essential for preventing data loss. Hence, you should create a local backup before using the clean install utility.
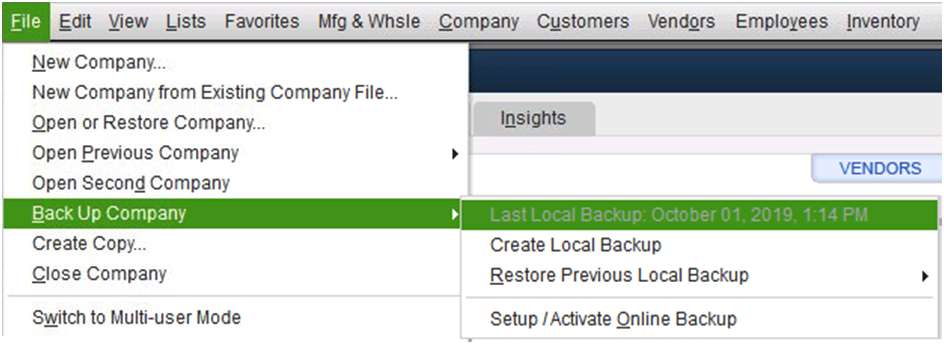
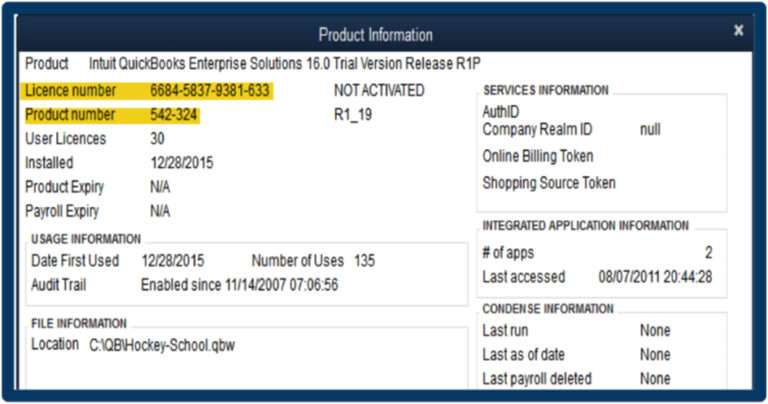
Keep Handy The Product and License Number: After re-installing the QB version, submission of account credentials is the first to-do task. Hence, you must keep the product and license number handy to simplify the process.
How To Use The QuickBooks Clean Install Tool?
Cleaning of QB software is simply a three-step process, including:
- Uninstallation of QB version.
- Renaming of installation folders.
- Re-installation of QuickBooks version.
However, the practical process involves the following steps for system cleaning:
Step 1: Uninstallation Of QB Desktop
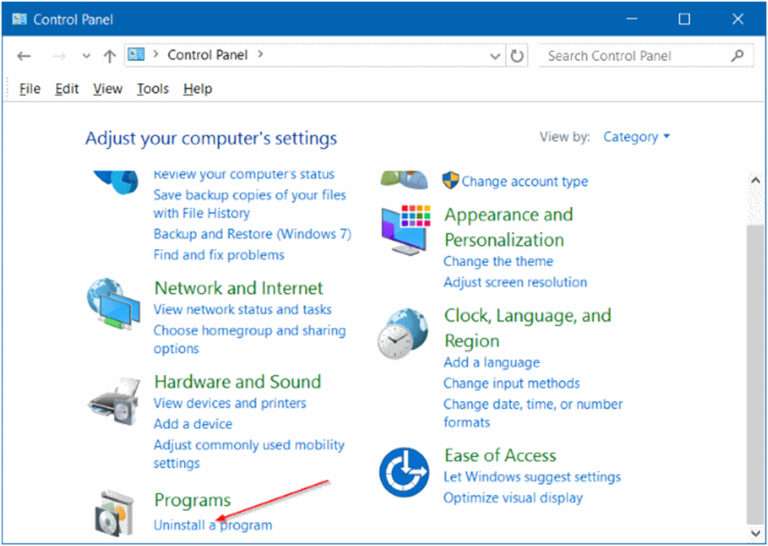
- First, open the “Run” command window using the “Windows+R” keys.
- Next, open the “Control Panel” using the command prompt and press “Enter.”

- After that, select the “Programs and Features” option.
")
- There, select the “Uninstall A Program” option.
- Now, locate QuickBooks Desktop and select it.
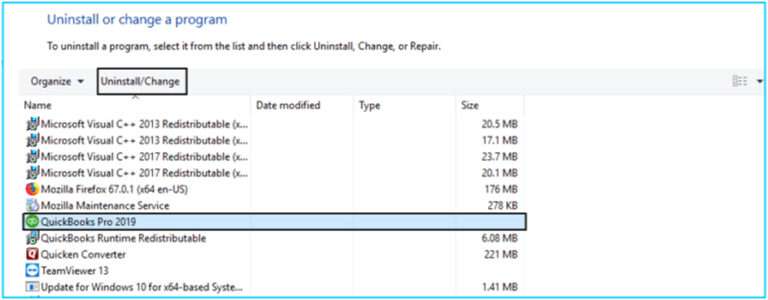
- Then, hit the “Uninstall” option and proceed further.
- Lastly, go with the instructions to remove QB Desktop from Windows.
Step 2: Renaming Of QB Installation Folders
- First, ensure the OS is compatible with displaying hidden files and folders.
- Afterward, open the “File Manager” and navigate to the “QB Installation” folder..
- Next, right-click the QB folder and tap the “Rename” option.
- Finally, write “OLD” after the folder name and move to the re-installation procedure.
Step 3: Run The QuickBooks Clean Install Tool
- First, download the QB Tool Hub and subsequently install it.
- Afterward, open the tool and navigate to the “Installation Issues” tab.
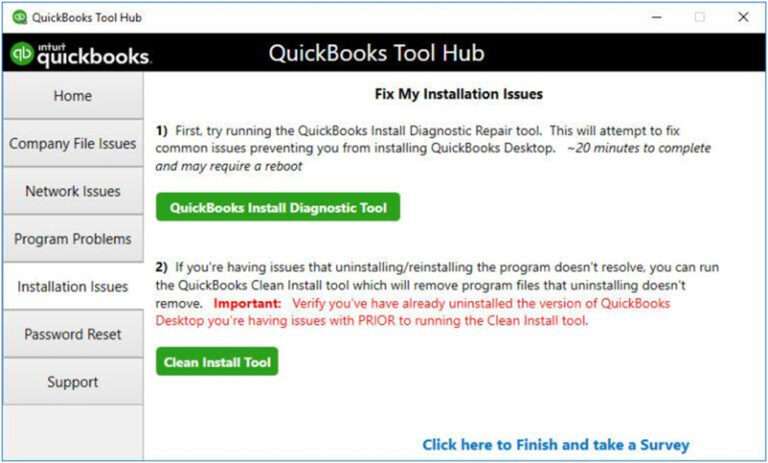
- Next, select the “Clean Install Tool” option and go with the on-screen prompts.
- Followed by this, wait for the tool’s operation and then move to the next step.
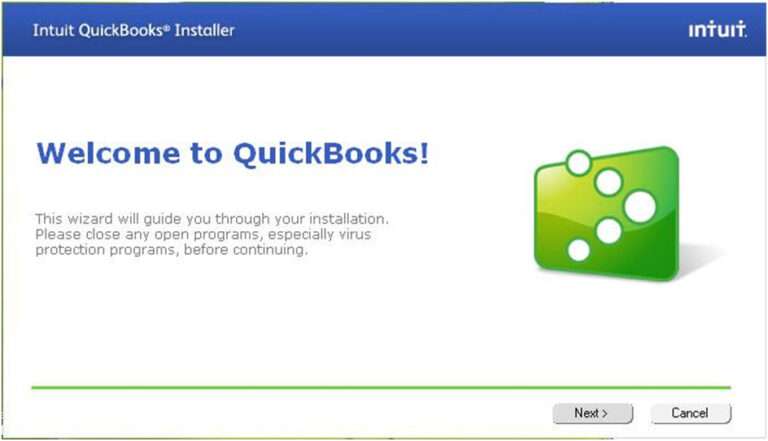
Step 4: Re-install QB Desktop
- First, open the software’s file and go ahead with the steps suggested as follows:
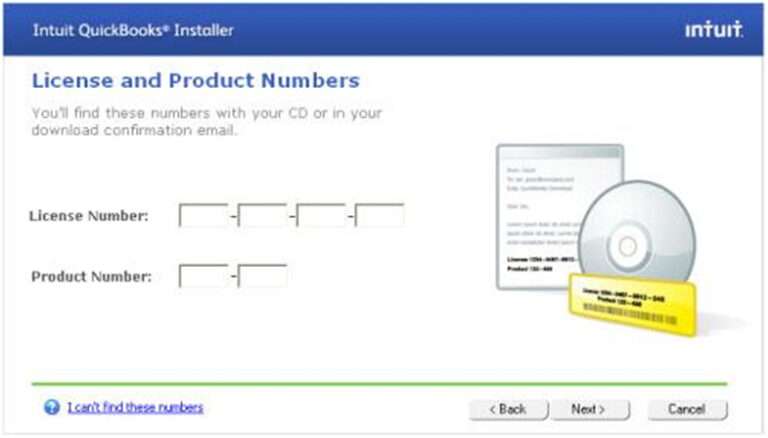
- At first, submit the product and license number.
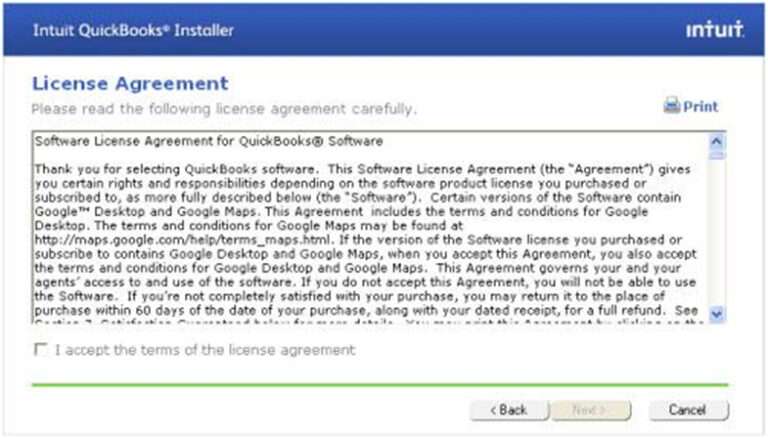
- Now, read the licensing terms and accept them.
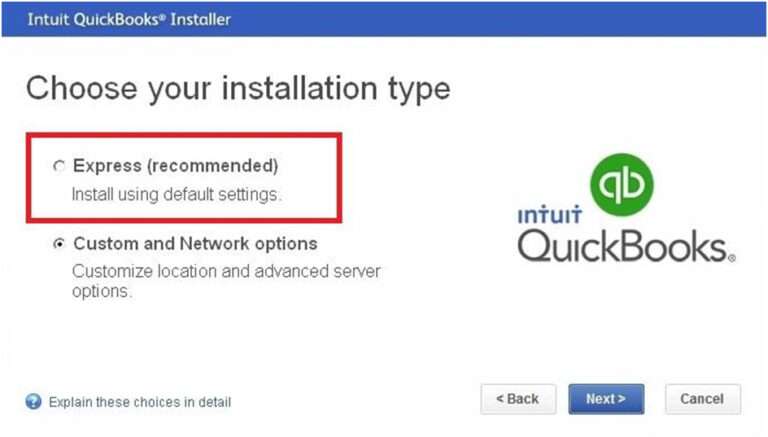
- Furthermore, select the installation type.
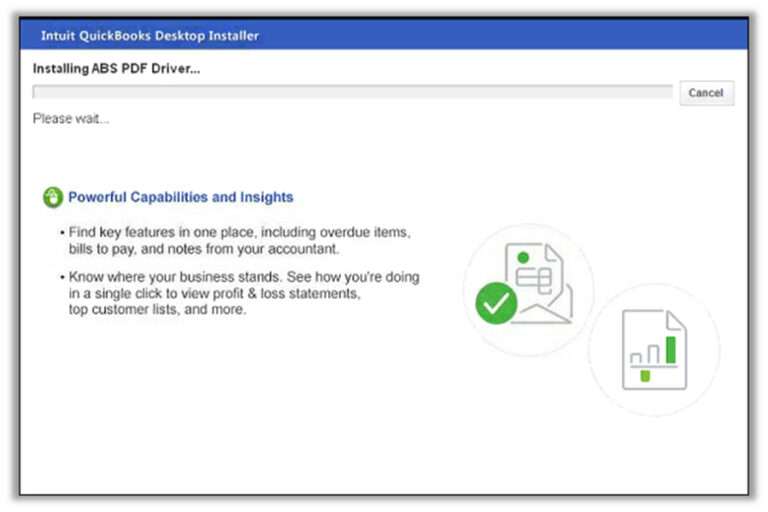
- Then, wait for the processing.
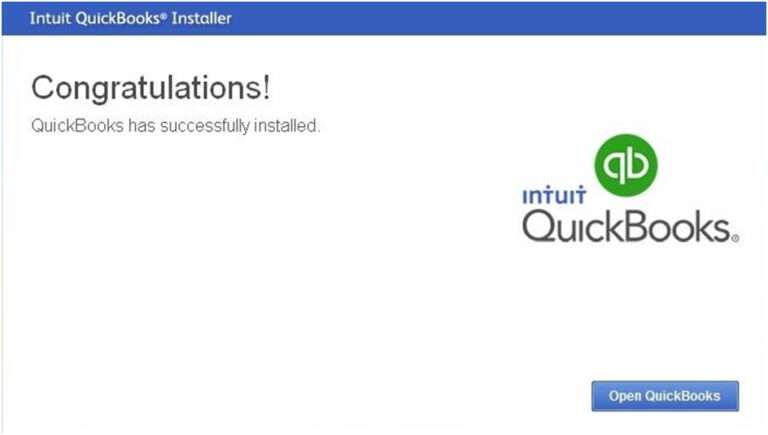
- Lastly, hit the “Finish” option to conclude the installation.
Winding It Up
We hope that the procedure defined in the given guide has served its purpose of explaining to you how to use the QuickBooks Clean Install tool. So, the next time you face difficulties in your QB version, try following these steps. Meanwhile, you also have the option to communicate with QB ProAdvisors regarding your concern. For this, you only need to dial the helpline number at 1-8447349204. Rest assured, experts’ assistance can provide a practical remedy for all your QB-related concerns.
Frequently Asked Questions
The QB Clean Install tool ensures a clean and fresh installation of QuickBooks software. Hence, you must install it to resolve installation issues, file errors, or QB errors.
No, you cannot use the QuickBooks Clean Install tool on Mac, as it is specifically designed for Windows OS.
To download the QuickBooks Clean Install tool, you need to follow these steps:
- First, visit Intuit’s official website and search for the tool.
- After that, go with the on-screen instructions to install the tool on your computer.
To completely remove QB from Windows 10, kindly follow these simple steps:
- First, open the “Control Panel” and select the “Uninstall a Program” option.
- After that, locate the requisite file from the list.
- Then, select the file and choose the “Uninstall” option.
- Lastly, go with the instructions to remove QB from your system.
You can utilize the QB Clean Install tool by first installing it from Intuit’s official website. There, you only need to follow the steps to use the tool. Thus, it can help you troubleshoot installation-related problems in QuickBooks.