
QuickBooks Install Diagnostic Tool: How To Download And Use It?

QuickBooks has established itself as a top accounting and bookkeeping software for businesses of all sizes. Undoubtedly, it offers a wide range of powerful features, but technical issues can sometimes degrade its performance during installation or operations. So, to address these issues, Intuit offers the QuickBooks Install Diagnostic Tool. And in this article, we will cover the following aspects related to the tool:
- Download procedure
- Installation manual
- User guide to harnessing its features
Hence, the guide will describe different aspects related to the tool. So, you must stay with the guide to learn more about your accounting framework. Meanwhile, you can dial the helpline 1-8447349204 to speak to ProAdvisors regarding your QB-related queries.
What Is QuickBooks Install Diagnostic Tool?
The QuickBooks Install Diagnostic Tool can help you troubleshoot installation issues encountered while setting up the QuickBooks desktop. Furthermore, it helps address problems related to Microsoft core components such as .NET Framework, MSXML, and C++. These components are vital for the proper functioning of QuickBooks. And the diagnostic tool automatically detects and resolves errors. This thing makes it an excellent facility for ensuring a smooth installation process.
Benefits Of Using QuickBooks Install Diagnostic Tool
The QuickBooks Install Diagnostic Tool is beneficial for you in many aspects. And some of the basic advantages of the app involve the following:
Efficiency
The tool is highly efficient for detecting and resolving installation errors.
Automatic Module For Error Detection
The QB Install tool works on an automated framework. This feature reduces the need for manual intervention. Thus, you can save a dedicated portion of time that you may otherwise need to spend on diagnosing the issue.
Minimal Human Intervention
Since the tool works on an automated module, it is less prone to human-originated error. That says because human intervention is one of the potential causes of increasing process timing.
Things To Remember Before Initiating The Installation Procedure
When using the QuickBooks Install Diagnostic Tool, it is important to remember a few key points.
- First, close all running programs before installing the tool on your desktop.
- No doubt, the tool will automatically detect and fix errors. But you can also try to restart your system.
- In case no error occurs on your screen, you can rediagnose the issue on your system.
QuickBooks Install Diagnostic Tool: Installation Framework
You need to follow these steps to install and use the QuickBooks Install Diagnostic Tool:
- First, visit the Intuit website to search the QuickBooks Diagnostic Tool file.
- Afterward, close all programs on your PC and save the required file.
- Now, go to the folder where you saved the QBinstall_tool_v2.exe file.
- And here begins the installation procedure.
- First, open the installation wizard by double-clicking the downloaded file.
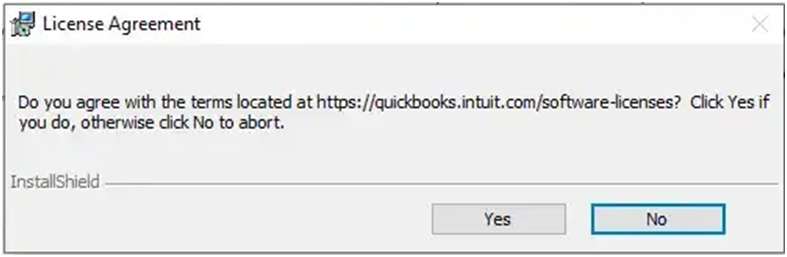
- Then, proceed further with the license agreement.
- Furthermore, click “Proceed” to initiate the scanning process.
- Moreover, restart the system after completing the scan procedure.
- At this step, open the tool, re-register with your QuickBooks ID, and activate it (if necessary).
- Notably, here you need to ensure the newness of the Windows operating system.
- Lastly, restart your system to save all the necessary changes.
Important Considerations For The QuickBooks Install Diagnostic Tool
Using the QuickBooks Install Diagnostic Tool is straightforward. Here, you should verify the following things before using the tool:
Ensure General Compatibility
In this step, you must check your system’s compatibility with the QB setup.
Configuration Of A New QuickBooks Company Data File
After ensuring the system’s general compatibility, it is time to configure company files in QuickBooks.
Verify Firewall Status
You can easily identify firewall-related issues through the QB Install diagnostic tool. You only need to submit information about the system’s firewall settings here. Rest the tool can fix installation-related glitches in QuickBooks.
Checking Network Connectivity
The Install Diagnostic tool can help you in examining network-related issues. If the connectivity issues persist, the installation may be interrupted. Hence, you should check the facility to troubleshoot the error.
Update Windows to the Latest Release
You should ensure that your system’s OS is up to date. See, an outdated OS can significantly abrupt your operational strength. Therefore, you should not take a chance with your system’s efficiency and update the OS. You can follow these steps after updating the system OS:
- First, restart your system.
- Afterward, check if QuickBooks starts without errors.
- Here, if it opens properly, open your company file and begin working.
- Contrary to it, if the QB installation fails, you should try reinstalling QuickBooks Desktop.
Troubleshooting Installation Errors with QB Install Diagnostic Tool
The QuickBooks Install Diagnostic Tool is a powerful tool for troubleshooting installation errors. Here, you need to acquaint yourself with the following steps:
Step 1: Download the QuickBooks Tool Hub Program
First, follow the download manual to install the tool-based facility on your system.
Step 2: Install The Tool On Your System
In this step, you must follow the on-screen instructions to install the tool setup on your device.
Step 3: Alternate Procedure Through The QB Tool Hub
Besides, you can use the QuickBooks Tool Hub to use the Install Diagnostic tool. You can proceed with this method in the following steps:
")
- First, open the QuickBooks Tool Hub program either from your desktop or by finding it in the Windows search.
")
- Afterward, select the “Installation Issues” tab from the list.
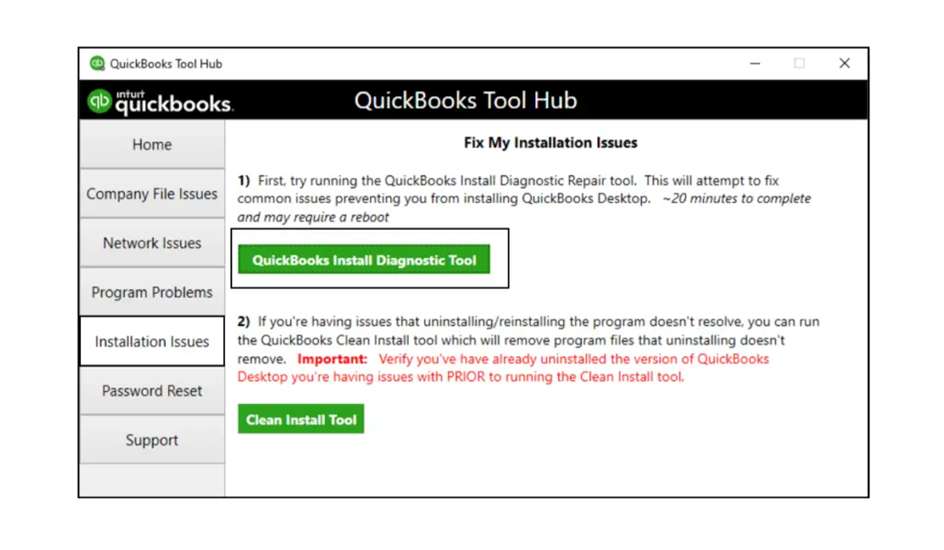
- Then, choose the “QuickBooks Install Diagnostic Tool” option.
- Now, the QBInstall tool will start automatically.
- At this point, allow the tool to run its course.
- Lastly, restart your computer and conclude the process.
Step 4: Manual Repair of Windows Components
Try repairing or reinstalling MS .NET Framework. Here, the process differs as per your OS version. And the details for these involve the following:
- For Windows 10, 8.1, and 8, the process lies in the control panel’s “Programs and Features”‘ option.
- For a 64-bit OS, it works with the installation from the “Run as Administrator” option.
Selective Startup Mode For Installing QuickBooks Desktop
The process of installing QB Desktop from selective startup mode involves the following stages:
- First, preparation of the data.
- Second, system processing in selective startup mode.
- Third, the installation of QuickBooks.
- Last, switch to the normal startup mode.
Things To Consider While Working In The Selective Startup Mode
- First, open MSConfig by searching for it in the start menu.
- Afterward, click “Selective Startup” from the system configuration window.
- Now, go to the Services tab, check “Hide all Microsoft services,” and click “Disable all.”
- Ensure “Windows installer” is check marked, and uncheck “Hide all Microsoft services.”
Steps To Reinstall QuickBooks In The Selective Startup Mode
- First, press Ctrl + R keys to open the “Run” window.
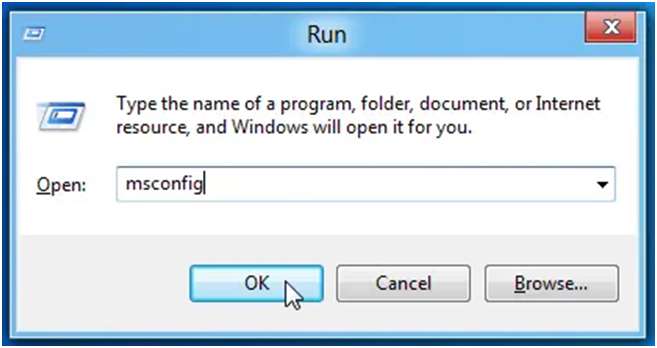
- Afterward, type “msconfig” and click OK.
- Now, hit the “Selective Startup” tab.
- And click on the “System services” tab.
- Subsequently, hit the “Startup items” tab.
")
- In this section, hit the “Disable All” option to hide all MS services.
- Furthermore, go to the Services tab and ensure the check marking of the “Windows installer” option.
- Subsequently, hit the “Ok” key to restart your computer.
- Lastly, reinstall QuickBooks using a clean installation process.
Conclusion
After discussing the QuickBooks Install Diagnostic Tool, there remains no doubt about its functionality. And you can term it a valuable tool for resolving installation errors in QuickBooks Desktop. Hence, you can follow the steps suggested above to download, install, and use the tool effectively.
Meanwhile, you can also dial the 24/7 helpline number 18447349204 if you face difficulty in operating this tool. We recommend this because the tool has some tricky functions. Hence, you can connect with experts and get a solution to your QB-related queries.
Frequently Asked Questions
QuickBooks Install Diagnostic Tool is an Intuit-developed software utility. It can help you in diagnosing and troubleshooting installation-related errors in QuickBooks software. Thus, you should deploy this facility on your accounting framework.
- First, download and install the QuickBooks Connection Diagnostic Tool from the official Intuit website.
- Then, open the tool and select the appropriate connection type.
- Now, submit the required network and company file information.
- At this step, click the “Connectivity Test” button to diagnose and troubleshoot connection issues.
- Lastly, review the tool’s diagnostic results and follow the recommended steps to fix any problems.
The component repair tool in QuickBooks is a software utility. You can use this tool to fix issues related to the following:
- MS .NET Framework
- Microsoft MSXML
- C++ Redistributable Components
In essence, the tool can ensure the smooth functioning of the QuickBooks software.
You need to download and run the tool from the official QuickBooks website to use the clean install tool in QuickBooks. The facility can help you resolve installation issues by removing all QuickBooks files and reinstalling the software.